Frequent search terms

- COMPO
- Guide
- Inspiration
- DIY
- DIY gift for plant fans: Macramé hanging basket mobile for cuttings
Step by step guide
DIY gift for plant fans: Macramé hanging basket mobile for cuttings
In addition to being a free and sustainable way to expand your family of plants at home, reproducing your own houseplants is also a great way to please your loved ones! And that's why we'd like to show you how to make the small plantlets look even better with a homemade macramé hanging basket for cuttings – and in so doing how to make a great gift for all plant fans.
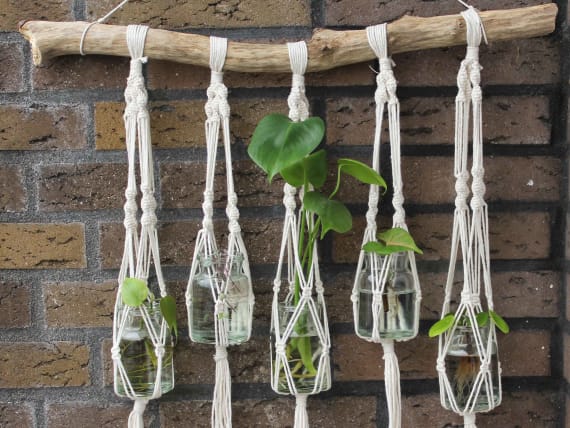
Macramé hanging basket mobile for cuttings – the materials
For the hanging basket mobile, you need a branch or a nice piece of driftwood. You can easily work the wood by removing the bark with a knife. You can then use sandpaper on the wood to expose the grain.
Small glass jars or vases are then used so as to place the cuttings and still unrooted offshoots in water. Alternatively, you can use old preserving jars – this DIY project is thus also ideal for upcycling!
The containers are attached to the branch with the help of individual macramé hanging baskets and a mobile comprising macramé hanging baskets is created. You need ten cords for each hanging basket. We decided to give the hanging baskets different lengths so that the mobile looks more varied than if all the containers were hanging at the same height. The twine should be thin enough to allow you to watch the little plantlets grow their first roots. This is especially relevant for small jars because otherwise the macramé knots will cover the glass. Our instructions are based on 3 mm macramé twine and vases with a diameter of 6 cm.
Material:
- a branch or driftwood
- sandpaper and a knife if necessary
- jars
- for the long hanging basket: 4 x 2.50 m; 4 x 2 m; 2 x 0.5 m macramé twine
- for the short hanging basket: 4 x 2.50 m; 4 x 1.5 m; 2 x 0.5 m macramé twine
Tip
Once the cuttings have enough roots to be planted in a pot, you can either use the jars for new plantlets or turn them into small flower vases.
How to make the macramé hanging basket mobile for cuttings
How to tie the gathering knot
- Cut the ten cords to the desired length.
- For the hanger, lay the cords over the branch so that the ends of the equally long ones are level. To make things easier, you can begin by hanging the branch in position.
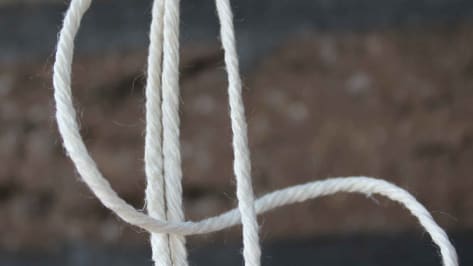
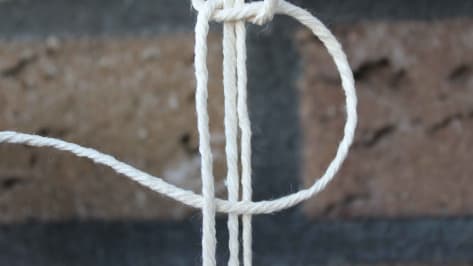
- Now tie a gathering knot by forming a loop open to the top with one of the two shorter cords. The cord must now protrude on one side.
- This protruding cord is wrapped around the remaining cords.
- Finish off by threading the cord through the loop. You can now tighten the gathering knot at the top of the macramé yarn.
Fine twist – tying spiral knots
- In macramé, a basic distinction is made between working and filler threads. The working threads are the eight longer ones and the filler threads are the shorter ones. For the second knot, the cords are divided into four groups so that two working threads and two filler threads are always knotted together.
- In the case of the spiral knot, the working threads are located on the outside and the filler threads are in the middle. To begin with, place the left-hand working thread over the two filler threads.
- Pass the right-hand working thread over the other working thread, behind the filler threads, and then bring it back to the front and tighten the knot.
- Keep repeating this step until you are happy with the length of the spiral knot. It is important to always start the knot from the same side because only then will it twist and form a spiral. For an even result, the filler threads must remain on the same side. It's especially important to pay attention to this when the twine is thinner (but easier to recognise when it is thicker).
- The spiral knot is tied with all four groups. Then leave some space and tie more rows of spiral knots. Make sure they are at about the same height. To tighten the first knot well, you can put a piece of cardboard or similar between the two rows. But with a little practice it's also possible unassisted.
Connecting with a square knot
- To enable the hanging basket to hold the jar with the cuttings, the cords are connected with each other. To do this, tie a filler and working thread from one group with those of another group. In the process, the filler and working threads exchange roles and the longer cords are on the inside.
- The cords are then connected with a square knot. In principle, this knot works in the same way as the spiral knot, i.e. the left-hand filler thread is laid over the filler threads and the other filler thread is then passed over the first filler thread, then behind the two working threads and back to the front.
- In contrast to the spiral knot, it is knotted alternately from the left and right and rather than a twist, the cross pattern is produced. Four knots are made in total.
- For the longer hanging baskets, we tied the four threads of each original group with four square knots again and for the shorter ones we tied the end part directly.
- You also need square knots for the end part. For the shorter hangers, these are made with a little space under the previous one. For the longer ones, the cords of two groups are tied together again so that a kind of net is produced.
- A gathering knot is then made under the last knot with the second short cord. Finally, simply cut off any excess threads and then the overhanging cords to the desired length.
Note: Endless possibilities
You can let your creativity run free with the macramé hanging baskets. For example, you can incorporate wooden beads or fray the overhanging threads with a comb.
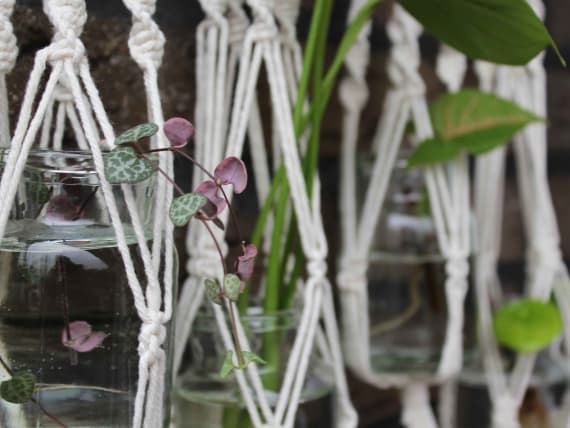
Suitable cuttings
You can now put the jars in the hanging baskets. To help the cuttings develop roots, pour a little water into the vases.
By the way, the best time for reproduction is in the spring before the houseplants sprout. Some houseplants can also be reproduced in the winter, however. These include:
- Monstera
- Devil's ivy
- Dragon tree
- Weeping fig
The above four houseplants reproduce well with cuttings and have no problems whatsoever with being cut during the winter, making them ideal for a small Christmas macramé hanging basket!
Alternatively, you can also plant offshoots. To do this, fill the containers with a layer of grit for drainage and put propagating soil on top of that. Since the jars don't have any drainage holes, it's important to make sure there is no waterlogging.
If you don't have suitable houseplants but know the recipient can make good use of the macramé hanging basket, simply fill the small vases or preserving jars with homemade Christmas biscuits or the like!
Suitable products
This might also interest you


