Frequent search terms

- COMPO
- Guide
- Plant Care
- Basics
- Planting properly
- The easy way to plant properly
The basics
The easy way to plant properly
Your plans for the next gardening season are already made and you can't wait to feel the soil in your hands and plant new flowers? We tell you what to look out for when planting garden and container plants and when it's the right time to plant.
Table of content
Five tips for planting properly
Whether you're a professional or novice gardener, planting properly is the key to creating a garden or balcony full of flowers. And that's why a few questions need to be answered before you start: When is the right time to plant? Where should my garden and container plants be located? How do I prepare my plants for the move into the bed or balcony box? Whether it's flowers, vegetables or houseplants, we share the key basics for planting properly.
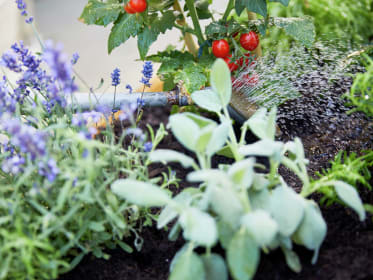
Sun or shade?
1. Finding the right spot
To make sure you get the most out of your green favourites, it's crucial to find a spot that meets the needs of the plant in question.
That's why you should check whether the plants prefer a sunny, semi-shaded or shaded location before planting them. Sun worshippers like lavender, thyme, rosemary, gaura, catnip and common sneezeweed want as much sunshine as they can possibly get. On the other hand, members of the Solanaceae family, such as the bleeding heart, plantain lilies and ivy love spending time in shady spots.
But neither shaded spots nor sunny spots are all the same. From semi-shaded, to partial sunlight to full sunlight, there are various gradations that make general categorisation difficult. Plants that thrive in light shade or partial shade, i.e. in an interplay of sun and shade that changes over the course of the day, would not survive in locations that are completely devoid of light. This means that the individual plant and its needs must always be considered in conjunction with other local factors, such as wind, soil quality and surroundings.
Tip! Before planting, also think about which plants are winter hardy. Plants that are particularly susceptible to frost should go in a container so that you can move them around as necessary.

Spring or autumn?
2. The best time of year to plant
When it comes to the garden, two periods are ideal for putting garden plants into the ground: the autumn (from the end of September to the beginning of December) and the spring (from the beginning of March to the end of April), as garden plants are in their dormant phase during these periods.
The decision as to whether to plant in the spring or autumn depends on the type of plant. Most perennial and hardy garden plants and shrubs grow better if they're planted in the autumn. This is because the temperature of the garden soil is usually still pleasantly warm in the autumn, allowing the plants to root well. At the same time, the rain provides sufficient moisture. When planting in the spring, you need to be prepared to provide more care, as sunny dry spells can occur quickly in the spring and plants need to be watered accordingly. Thanks to their strong root system, they are not as sensitive to dry spells by the summer. Hardy autumn or winter flowers are usually not planted until September.
On the other hand, plants that are susceptible to frost, such as lavender, peach trees, hydrangeas or hibiscus, which are either in the garden or outside in a container all year round, will find it much easier to cope with their first winter if they are planted in the spring. Non-winter-hardy summer flowers such as petunias, geraniums or verbenas should only be planted when any risk of frost has passed, i.e. usually after the Ice Saints period in May.
Container plants, bare root or with a root ball?
If you go to nurseries or garden centres in search of suitable shrubs, hedges or bushes, you will inevitably come across the terms bare root, container plants or root balled. In fact, the growth habit or 'packaging' of your garden plants is an important criterion for deciding when the right time to plant is. But what is the difference?
- Bare-root plants are sold without any soil on their roots. Accordingly, their root system is more sensitive to frost and wind, so it's best to plant them directly after purchase. Bare-root plants are generally only sold between autumn and spring. The perfect time to plant is in the autumn. Depending on the weather, the period starts at the end of September and continues until well into March.
- Plants that have been grown in a pot, so-called container plants, can basically be planted all year round. Ideally, depending on the weather and type of plant, potted plants should be planted from January to May – as long as it isn't too hot – and from the end of August to December – as long as there's no ground frost. Planting in midsummer is also possible but can be dangerous because the risk of drying out increases due to the summer heat. Make sure the plant has actually grown in a pot and was not simply put into one afterwards. You can tell this by the fact that the root ball remains firm and intact after it's removed from the pot. On the other hand, if it falls apart easily, it's advisable to choose a different plant.
- In the case of more sensitive specimens, root-balled plants are often preferred. This is where the root area is sold in a soil ball that's usually held together by a cloth. Root-balled plants usually have more fine roots and thus grow more reliably. Root-balled plants can be planted in both the spring and the autumn.

Soil for garden and container plants
3. The perfect base
For garden plants
In addition to the right amount of sunlight, soil quality is another important local factor to consider before you put the plants of your choice into the garden.
The main components of soil are sand, silt and clay. Most plants usually prefer a happy medium with similar proportions of sand and clay. The majority of garden soils are suitable for a variety of plants. On the other hand, soils containing a lot of clay but not much sand are referred to as heavy soil and those dominated by sand as light soil. Such soils are not ideal for all plants.
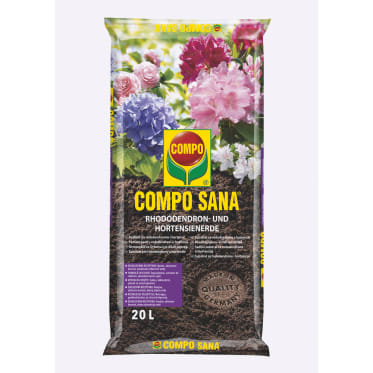
Note! The soil's pH level is also crucial. Most garden plants prefer a neutral pH of between 5.5 and 6.5. Having said that, certain bog-soil plants such as blueberries, cranberries, rhododendrons and azaleas will only thrive in acidic soils with a pH of less than 5.5. In this case, the garden soil should be dug out well before planting and filled with acidic 'COMPO SANA® Potting Soil for Rhododendron' and for hydrangea.
For container plants
Waterlogging is a major challenge with container plants because it's easy to overwater the limited space accidentally. Ideally, your containers should have a drainage hole through which excess water can escape.
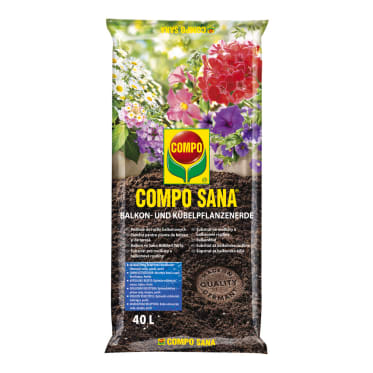
A layer of planting granules at the bottom of the plant container is an effective way of preventing waterlogging and root rot. Then choose a special, high-quality container plant soil suitable for the specific needs of the plant. Generally speaking, a universal soil like the 'COMPO SANA® Potting Soil for Balcony Plants' is suitable for a large variety of balcony and container plants. It contains an optimised micronutrient mix that feeds your plants with nutrients for up to 12 weeks. The high-quality Aqua Depot® also stores some of the irrigation water, delivering it to the plants as needed.
Give it a dip, please!
4. Preparing plants for going into the soil
To ensure your garden and container plants can grow reliably, they need to be prepared properly before you plant them. It's advisable to place bare-root plants in a bucket of water for a few hours beforehand to enable the roots to soak up enough moisture. You should wrap your bare-root plants in a damp cloth after purchase if you're not planting them immediately. If you've found damaged or bent roots, cut them back with secateurs to stimulate the plant's root growth.
It's also advisable to dip container or root-balled plants in water for a few minutes before planting them. After that, they're ready for planting!
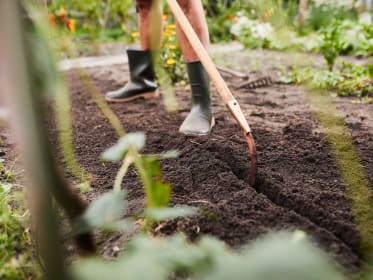
How much space should I leave between the plants?
5. Allow sufficient spacing
Bedding plants
The spacing you should maintain when planting in the garden basically depends on the type of plant, its size and its growth habit. The larger a plant is, the more space it will need. The small, compact height of young plants can be deceptive at first glance. In particular, perennials and vegetable plants usually gain in height and width considerably after they are planted.
That's why it's important to give bedding plants in the garden enough space, i.e. so that they don't grow too close together. Insufficient spacing can promote the spread of disease – air circulates less easily in confined spaces, allowing fungi, for example, to spread quickly and infect adjacent plants. At the same time, plants that are too close together may take light, nutrients and water away from each other. In the worst case, single plants are completely crowded out by more dominant, stronger neighbouring plants. But too much space between plants can also be a problem, as large open areas allow weeds to spread more quickly between bedding plants. That's why you should always pay attention to the information on the plant's label.
Plants in a pot
To make your container plants feel at home, the pot should be at least three centimetres wider than the one you bought the plant in. The root ball should have ten centimetres of space around it in all directions.
If you want to plant flowers, perennials or grass together in a large container, the right arrangement is crucial – not only for the plants to thrive, but also for the aesthetics! That's why you should place larger plants in the middle and smaller, low-growing species around the edge of the container. This will ensure that all your container plants get enough sunlight and come into their own perfectly.
Need some inspiration? Discover how to design a beautiful container plant for the patio completely in plain white in our article.

Step-by-step guide
Instructions for planting in a container
1. Fill with drainage layer and soil
Place two or three pieces of clay over the drainage hole to prevent soil from clogging it or the plant's roots from growing through it. Then spread a layer of granules on the bottom of the container to prevent waterlogging. The drainage layer should account for about a quarter of taller containers, while shallower containers should be filled with a third of granules. After that, fill the container with a soil created for container and balcony plants.

2. Adding the plants
Once you've prepared your container or balcony box, you can take the plants of your choice out of their old pot and loosen up the root balls. Then place the plant at the same height as before and fill the remainder of the container with soil. Ideally, leave a margin of two to three centimetres for watering, i.e. a gap between the top edge of the pot and surface of the soil. This will give the water sufficient space to seep through slowly.
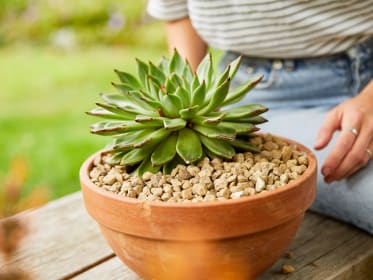
3. Mulching with granules
Now gently press the soil to prevent any cavities from forming in the flower container. You can then cover the top layer of soil with granules – this will prevent the soil from drying out and at the same time gives the container a natural decoration.

4. Now water!
To allow your plants to take root well, you need a little water – and your container now has plants in it!
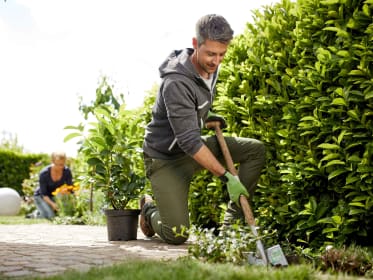
Step-by-step guide
Instructions for planting in the garden
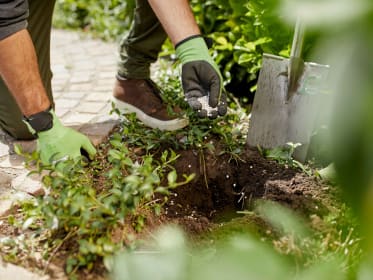
1. Dig a planting hole
For plants with a root ball, the diameter of the hole should usually have twice the depth and width as the actual root ball.
2. Loosen up the soil
Then loosen the soil of the planting hole with a garden fork or spade. You can also spread a layer of granules in the hole to loosen the soil a little more. Depending on the type of plant, you can now mix in a solid slow-release fertiliser with the previously dug soil. This will release its nutrients evenly, benefitting the plants over several months.

3. Adding the plants
Now carefully loosen the root ball of your garden plants by hand to stimulate root formation. Then you can plant them and fill the planting hole with the soil. The plants should only be as deep as they were before in the pot or soil and any grafting points must be above the soil surface. For taller trees and shrubs, you can put a stake in the planting hole for support.

4. Press down and water
Then press down the soil carefully with your foot so that no cavities can form beneath the surface. And now don't forget to water the plant! Water directly onto the soil rather than over the plant.
Small tip! Mulch your plants
Mulching your plants can be helpful in the warm and dry temperatures during the spring. Simply spread a thin layer of mulch – about three centimetres thick – around the plant. This will ensure that less water evaporates, meaning you don't need to reach for the watering can so often.
Tips for further care
Your work in the garden isn't done after planting – the right care going forward is equally important! One of the crucial care measures for your garden and container plants is watering. After all, you will only enjoy your newly planted green friends for a long time if you give them enough water. Discover what to look out for when watering your plants in our A to Z of watering.
If you didn't provide your plants with a slow-release fertiliser directly when you planted them, this is something you can also do later on – because they need nutrients to be available on tap in the growth phase, in particular. Here you can find more tips on how to fertilise properly.
These topics may also interest you
The right products for planting properly


