Frequent search terms

- COMPO
- Guide
- Plant Care
- Herbs, fruits and vegetables
- Indoor gardening: Gardening on the windowsill
Indoor gardening: Gardening on the windowsill
Don't have a garden or balcony but still feel like gardening? Besides caring for houseplants, you can also grow fresh vegetables for seasoning food and look forward to crisp salads or fragrant herbs. How do you do that? We're talking about indoor gardening. We reveal which vegetables and herbs you can grow in your own four walls.
Table of content
What does indoor gardening mean?
Indoor gardening basically means gardening and harvesting produce on your windowsill. After all, a wide variety of sprouts, vegetables and herbs can be grown on the windowsill, allowing you to enjoy your daily dose of vitamins even without a balcony or garden. Although the harvest isn't as abundant as it would be in a large vegetable patch, it's great fun – and you can even grow quite a lot in the winter, too! Rather than self-sufficiency, it's more about the pleasure of gardening. A sophisticated planting system isn't needed for the harvest to succeed. We explain below how to grow your own vegetables and herbs on the windowsill!

Plants for the windowsill
From alfalfas to peas – you can grow a wide variety of different plants on the windowsill. Sprouts or microgreens can be grown from many different herbs and vegetables with edible leaves that taste good. These include broccoli, small radishes, peas, mung beans, quinoa, cress, basil, alfalfa or rocket. Vegetables with toxic leaves are not suitable. These include members of the Solanaceae family, such as potatoes, chillies or tomatoes. Beans are not suitable as microgreens or sprouts, either. On the other hand, you can grow other legumes like lentils or peas on the windowsill. You can even try to make the plants grow a little bigger so that you can harvest one or two pea pods later on.
Would you like some fresh tomatoes or lettuce leaves? If so, try out small bush tomatoes and curled lettuce! You can also try your luck with small radishes and chard. Kitchen herbs are ideal, too. Parsley and rosemary can be sown directly on the windowsill, for example. On the other hand, we advise against growing larger vegetable plants like pumpkins, courgettes, cucumbers, stake tomatoes and watermelons. These need far more sunlight and space to grow than they'd get on a small windowsill.
What do you need for indoor gardening?
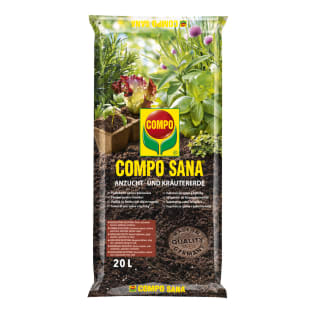
For plants to feel comfortable indoors, they need good conditions. And the right basic equipment is the first step. The equipment varies a little depending on whether you want to grow vegetables or sprouts. Having said that, you don't really need much at all to get started with indoor gardening. All it takes to grow sprouts are a jam jar with holes in the lid and a saucer. And to grow microgreens, an old lunch box and some kitchen paper are often enough. If you want to create a small herb garden on the windowsill, a few pretty pots with drainage holes, some herb soil and a small watering can will be part of your basic equipment. A bright windowsill is also necessary for microgreens, herbs and small vegetables. We recommend a grow light for the winter. You can also use a smart garden system if you want to, but this isn't a must.
Indoor Gardening – tips for sowing & growing plants

1. Sprouts on the kitchen counter
When it comes to gardening on the windowsill, sprouts are a classic. These are germinated seeds that are ready for harvesting after only a few days, meaning they contain a concentrated load of vitamins and fibre. You don't need soil for sprouts. They are grown in a special sprout jar instead. This has a lid with a sieve through which you can drain off excess water. You can make a sprout jar with an old preserving jar, for example, by drilling holes in the lid. It's essential that the jar has been cleaned properly to prevent rotting. Put some of the seeds into the jar and cover them with about twice the amount of water to ensure they are well soaked. Drain the water after 8-12 hours and then rinse the seeds with fresh water. Mucilaginous seeds, such as rocket, shouldn't be soaked. After that, rinse the seeds with fresh water at least twice a day. Then place the glass slightly tilted on a saucer to allow the remaining liquid to drain off. This is important to prevent the formation of harmful germs. You can eat the sprouts and seeds together after a few days.

2. Microgreens on the windowsill
Microgreens are usually sown in propagating soil or a little kitchen paper or cotton wool and harvested as soon as the first leaf pairs have formed. So, don't wait for the small pea seedling to turn into a large plant with lots of pea pods. That's why they're also called microgreens.
Simply cut off the entire plant above the surface of the soil and use the microgreens as a delicious salad or stir-fry topping. You can try leaving the first leaf pair and with a bit of luck the microgreens will then sprout a second time. Even the small plants are regarded as an absolute superfood.

3. Small herb garden
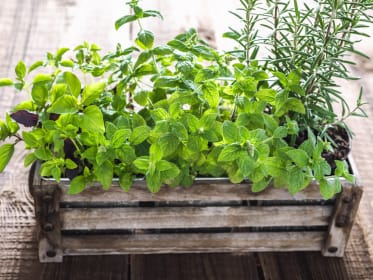
Fresh herbs for cooking and seasoning all year round? Admittedly, plant growth isn't ideal indoors, but it isn't impossible, either. A bright spot and regular pest control is important, especially in the winter. But unlike microgreens and sprouts, you need to allow a little more time for your first harvest. After that, you can help yourself to a herb buffet for a long time and will have the right seasoning for your dishes. We show you the right way to grow herbs step by step.
Tip
Bright spots are usually in short supply in the autumn and winter, in particular. A special grow light can be helpful here and will ensure your plants grow well despite the poor light.

4. Vegetables for picking
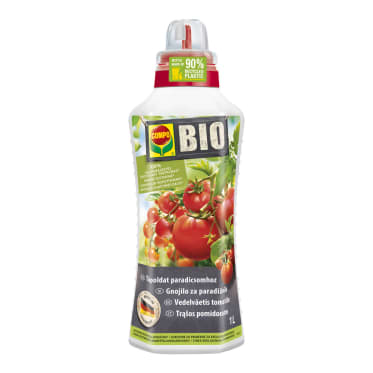
You can even grow some types of vegetable on the windowsill. The best types of vegetable are those that grow quickly and produce tasty leaves. These mainly include salads such as rocket and curled lettuce, but also chard or cabbage if they are grown for picking. On the other hand, fruiting vegetables are far more difficult to grow. There is usually too little space available and the environmental conditions are not ideal. But you can try to grow small tomato varieties or chillies indoors. It's important to ensure that your plants are in a very bright spot to allow them to grow healthily. It's advisable to choose a south-facing window and not to plant the vegetables until the late spring. You can also sow and prick out the tomatoes or chillies yourself. You can start sowing as early as January. Grow the vegetables in a pot or a balcony box with drainage holes, for example. Ensure the plants have enough space for their roots to develop. For example, a pot diameter of 20 cm is usually sufficient for small tomato or chilli varieties. Small radishes are perfect for sowing in a row in a long balcony box. Before planting, it's advisable to add a layer of pumice stone in the container for drainage. This will prevent waterlogging. A layer of nutrient-rich vegetable soil, such as the COMPO BIO Potting Soil for Tomatoes and vegetables, should then be added on top of that. After that, put the plant or sow the seeds in the pot, press everything down well and water the soil properly.
Regrow – cultivate vegetable leftovers rather than throwing them in the bin!
Regrowing is another great way to harvest vegetables on the windowsill. It's also hugely sustainable, as vegetable leftovers that would otherwise end up in the waste bin are made use of. A simple option for fresh greens for seasoning is to harvest the leaves of onions and garlic. To do this, put the vegetable with roots facing down on a tray with some soil and regularly moisten it with a little water. Once the onions have taken root and the green part is larger than 10 cm, you can cut it off. For the onions to sprout again, it's important that you don't cut directly above the substrate.
This might also interest you
Suitable products for your plants


